Inspection's expertise
Once the user has gone through all the mandatory steps, the inspection is sent for Expertise.
Scenario Inspection’s Expertise may include in a few steps like:
-
Check that all inspection steps have been completed - some steps may not be necessary (setting Mandatory step or Minimum number of photos per step = 0 in Inspection Template)
-
Check the quality of each of the steps - for compliance with the instructions of the executed photo or video (allows you to take the entire inspection at once)
-
Checking damage fixation. VIEWAPP uses automatic vehicle damage detection.
-
Approval of the inspection by the Approving Person - in special cases (step is available when enabled the setting Send to approval fr om expertise on changes in Inspection Template)
-
Signing the result of the inspection with users - by applying a simple electronic signature (step is available when enabled the setting Request signature of a document after a successful expertise in Inspection Template)
To start the Expertise find an inspection of interest o choose one from Inspection queue
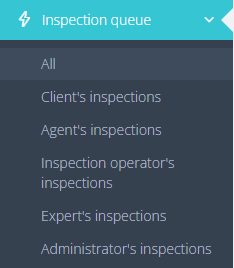
If the required inspection is not found in the Inspection Queue - you should search for such inspection in the list Incomplete inspections
Incomplete inspection
If the required inspection is found in the Incomplete inspections - for further work it must be manually Completed by the user or the Expert “Move to expertise”.
Press “View” to open Incomplete inspection.

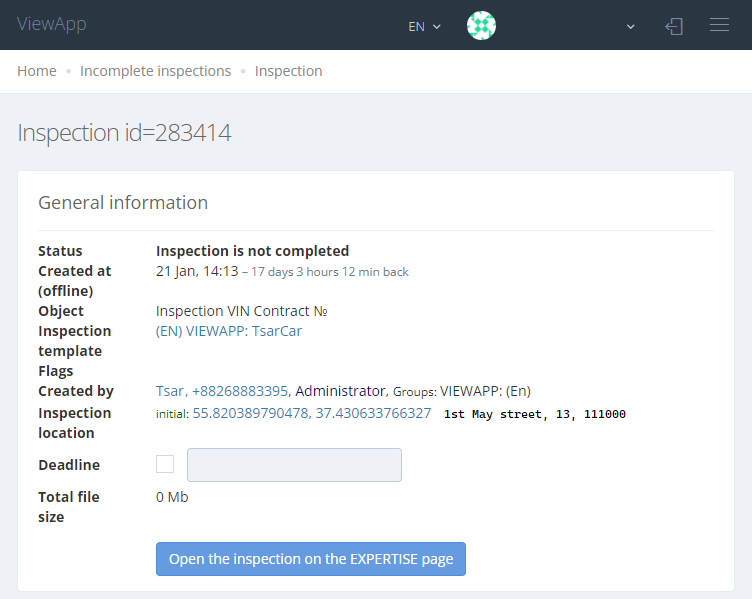
On the page that opens with an unfinished inspection is present:
General information
-
Status - current inspection status (for example, “Incomplete inspection”);
-
Created at (offline) - date and time the inspection created;
-
Object - name of the inspection;
-
Inspection template - inspection template, which uses in the inspection;
-
Created by - user which created the inspection;
-
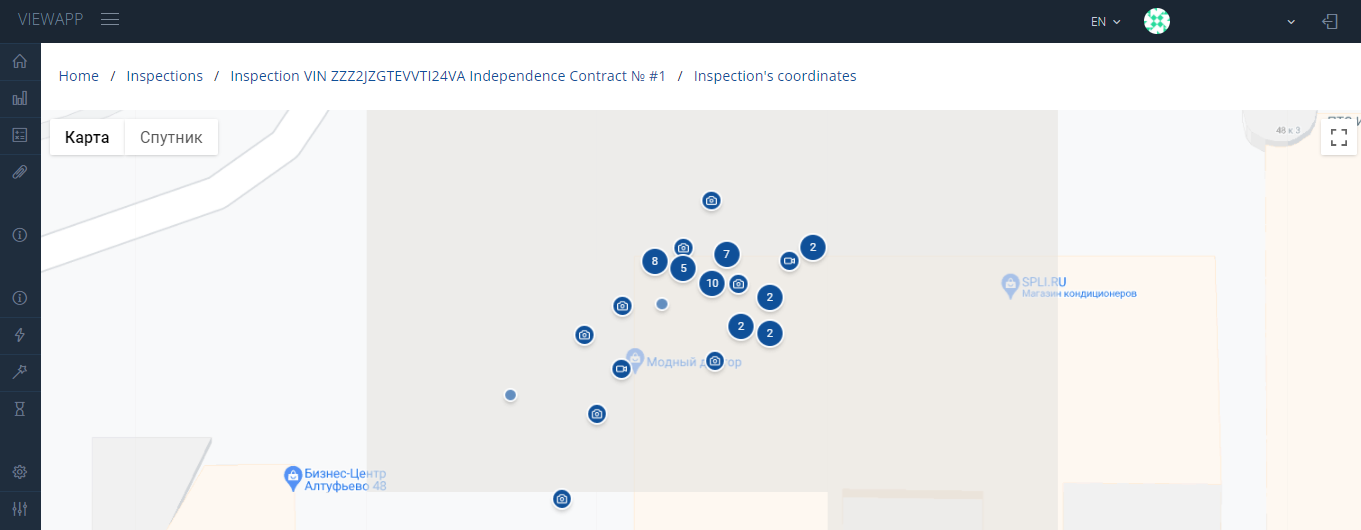
Inspection location - coordinates and (if available) inspection address;
Press “Inspection map” to view new page with the points of the inspection on the map:
-
Deadline - flag and a given deadline for the inspection;
-
Total file size - size of the all files of the inspection;
-
“Open the inspection on the EXPERTISE page” - available to open the inspection on the Expertise page.
The page below provides information about all inspection steps in the current state of readiness (that is, including unfinished steps and incomplete fields):
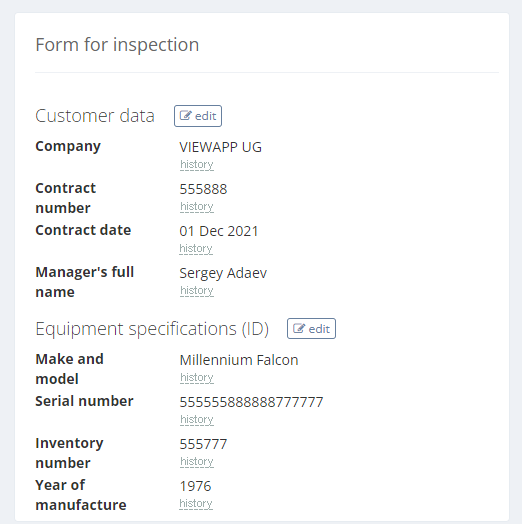
Form for inspection
The section contains an Editable form to be filled out by the user when performing an inspection.
Completeness of processes according to the inspection templates
The section contains information about the processes to be performed in the inspection, as well as the history of these processes.
Tech information:
Flags status: Repeatable, Coordinates are required
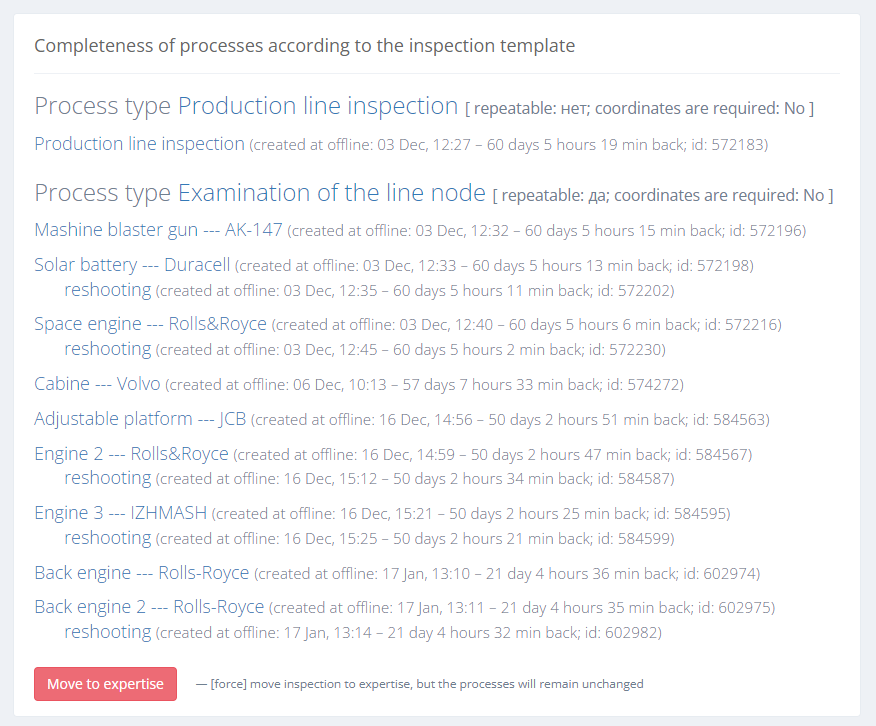
The "Move to expertise" button, available to the user with the Expert role, allows to forcibly move the current unfinished inspection to the Expertise status and continue working with the inspection as completed.
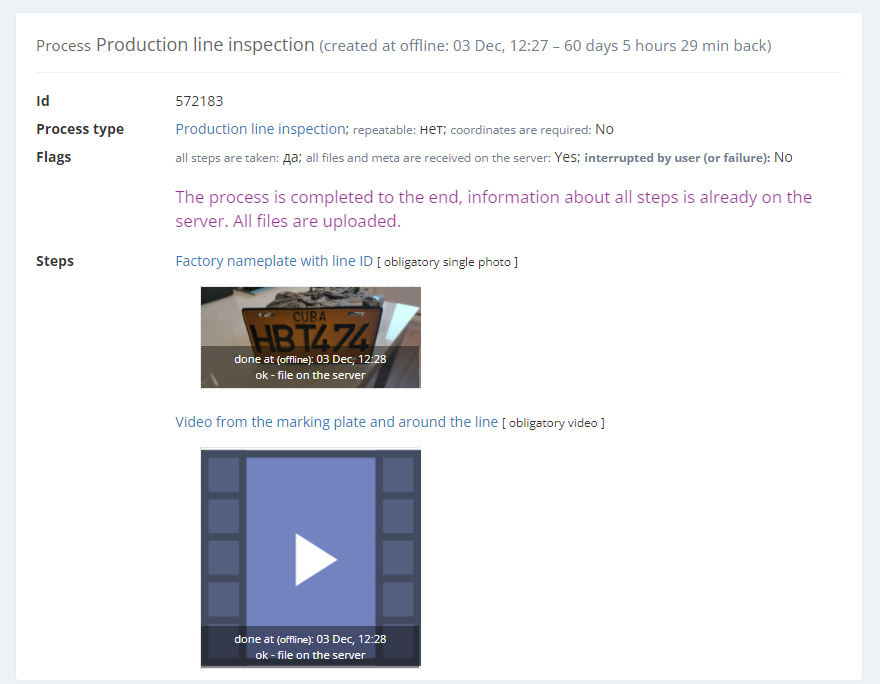
Processes created in the app
The section includes all of the user's attempts to perform the shooting processes - in chronological order.
Tech information:
-
id - order of the process
-
Process type - name of the process, flags status: Repeatable, Coordinates are required
-
Flags - the status of the process: whether all steps have been made, whether all files and metas have been received by the server, whether the inspection was interrupted by the user (or whether there was a failure)
-
Steps - inspection steps to be performed by the user
If the extent of the inspection is sufficient for the Expertise - such inspection should be "Move to inspection" and "Open the inspection on the EXPERTISE page", and then continue with the inspection on the Expertise page.
Inspection in Expertise
If the inspection is already in the Expertise status, find the inspection of interest through the My inspections and Inspection queue menu:

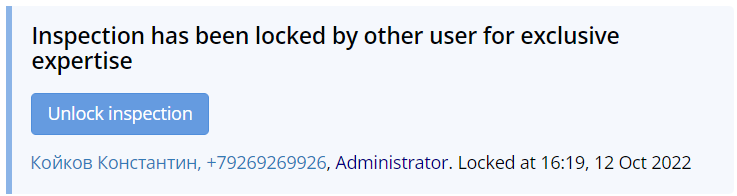
When performing an Expertise, the Expert can use the "Lock inspection to me" button to prevent other users from changing the data during the expertise.
The Expert will be notified additionally about the necessity of the Lock if the inspection has started without including it.
Press “View” to open the inspection on the Expertise page.
The Expertise page has the following information:
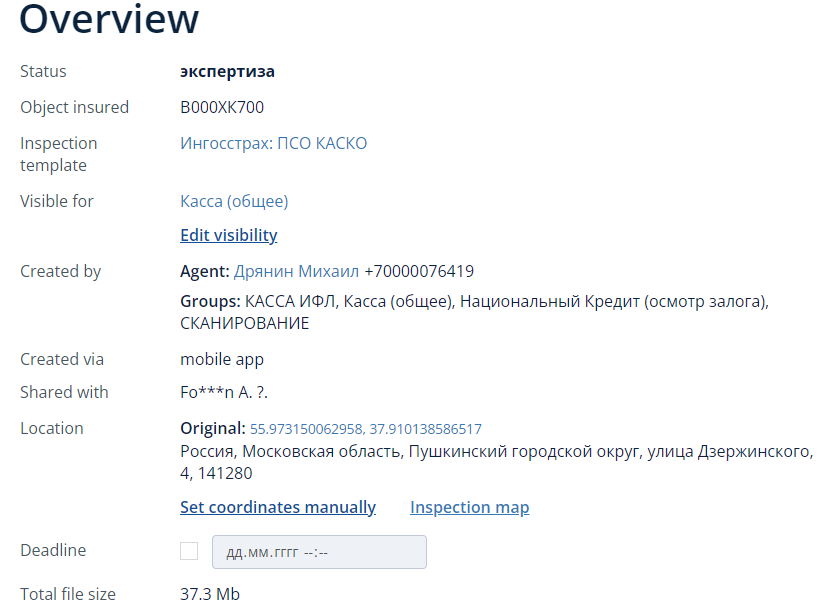
Requisite of the inspection
| Status |
Current inspection status, more info about statuses at Status model;
|
|
Inspection is not possible |
Contains the user's comment if he completed the inspection with the flag "Inspection is not posible". It is also possible to return such an inspection to the user immediately with the "Resume the inspection" button;
You can filter out all inspections marked "Inspection is not possible" on the My inspections page.
|
|
Object |
The name of the inspection object, formed by the Name Formula, which is set up in the inspection Template;
|
|
Inspection template |
Inspection template, which uses in the inspection;
|
|
Visible for |
Visibility of the inspection to users from the specified access groups;
|
|
Created by |
User which created the inspection;
|
|
Created via |
Which interface was used to create the inspection: web interface, mobile app or API;
|
|
Shared with |
Users who additionally have access to the current inspection;
|
|
Place of inspection |
Physical coordinates of the inspection site.
The availability of the change (via Set coordinates manually link) depends on the inspection template settings. The "Inspection Map" link allows you to view all inspection points on a map on a separate page; |
|
Execute deadline |
Deadline date of the inspection.
The availability of the change depends on the inspection template settings. Does not affect the availability of the inspection to the user, but shows additional PUSH notifications to the user in the mobile app; |
|
Expertise deadline |
Deadline date of the inspection.
The availability of the change depends on the inspection template settings. |
| Links to other inspections | Links to inspections that were created from the current inspection or, conversely, the inspection from which the current inspection was created, are specified. |
|
Total file size |
Size of the all files of the inspection.
|
|
Signed document versions |
Information about all versions of the signed files like Date and time of signing, Name of the signed file, Name and Phone number of the user who signed the file. 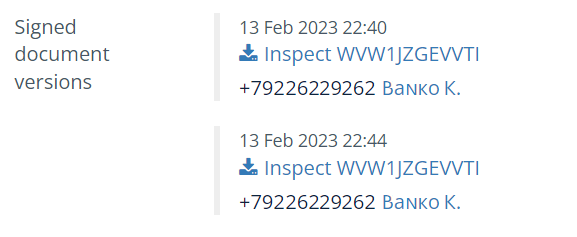
|
|
The client has reviewed and signed the document |
Phone number of the recipient of the SMS code that was used to sign the final PDF document, and date of the sign
|
| Block The user refused to sign the document |
The block appears if the user refused to sign the document in the status of signing (clientagreement) and indicated a comment on either the entire document or the fields of the Editable form and clicked the "Send changes" button. The block will either show a Comment on the entire document, or the number of fields for which changes have been suggested. In the latter case, these fields will be listed at the bottom of the current page. 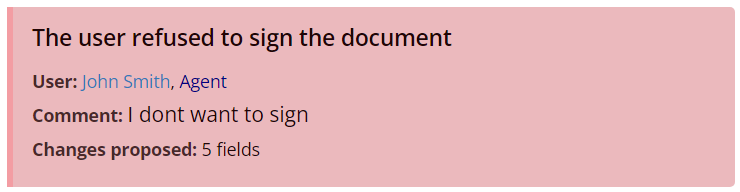 |
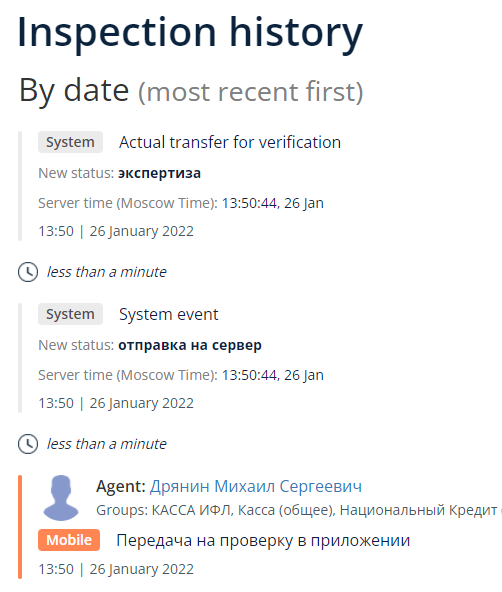
Inspection history
In the Inspection history block you can see the Current inspection status, as well as the history of the previous statuses with their date and time.
Available actions
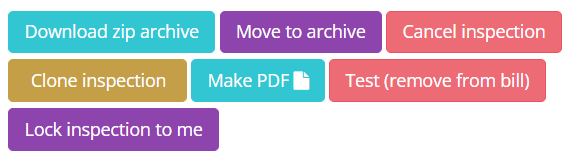
“Download zip archive” - by pressing the button, the system generates an archive consisting of all files (photos and videos) of the current inspection, as well as a PDF form and gives the user a link to download it;
“Move to archive” - allows you to move the current inspection to the archive and hide it from the main list of inspections;
List of conditions under which the function "Move to archive" is available:
1. If the inspection is returned for repeat → it is not possible to archive it for the first 20 days, then it is possible.
2. Incomplete inspection → cannot be archived for the first 5 days, then you can.
3. The inspection is awaiting confirmation with a code from SMS → cannot be archived.
4. In contract status → you can archive it immediately.
5. Failed verification → can be archived immediately.
6. The inspection is sent to the server → cannot be archived (this may break the sending).
7. In Expertise status → can be archived immediately.
8. If the inspection is shared with someone, and the inspection is not completed, then it cannot be archived for the next 20 days.
“Cancel inspection” - allows you to cancel the current inspection and remove it from the list of inspections; Reverse action - “Return to active”
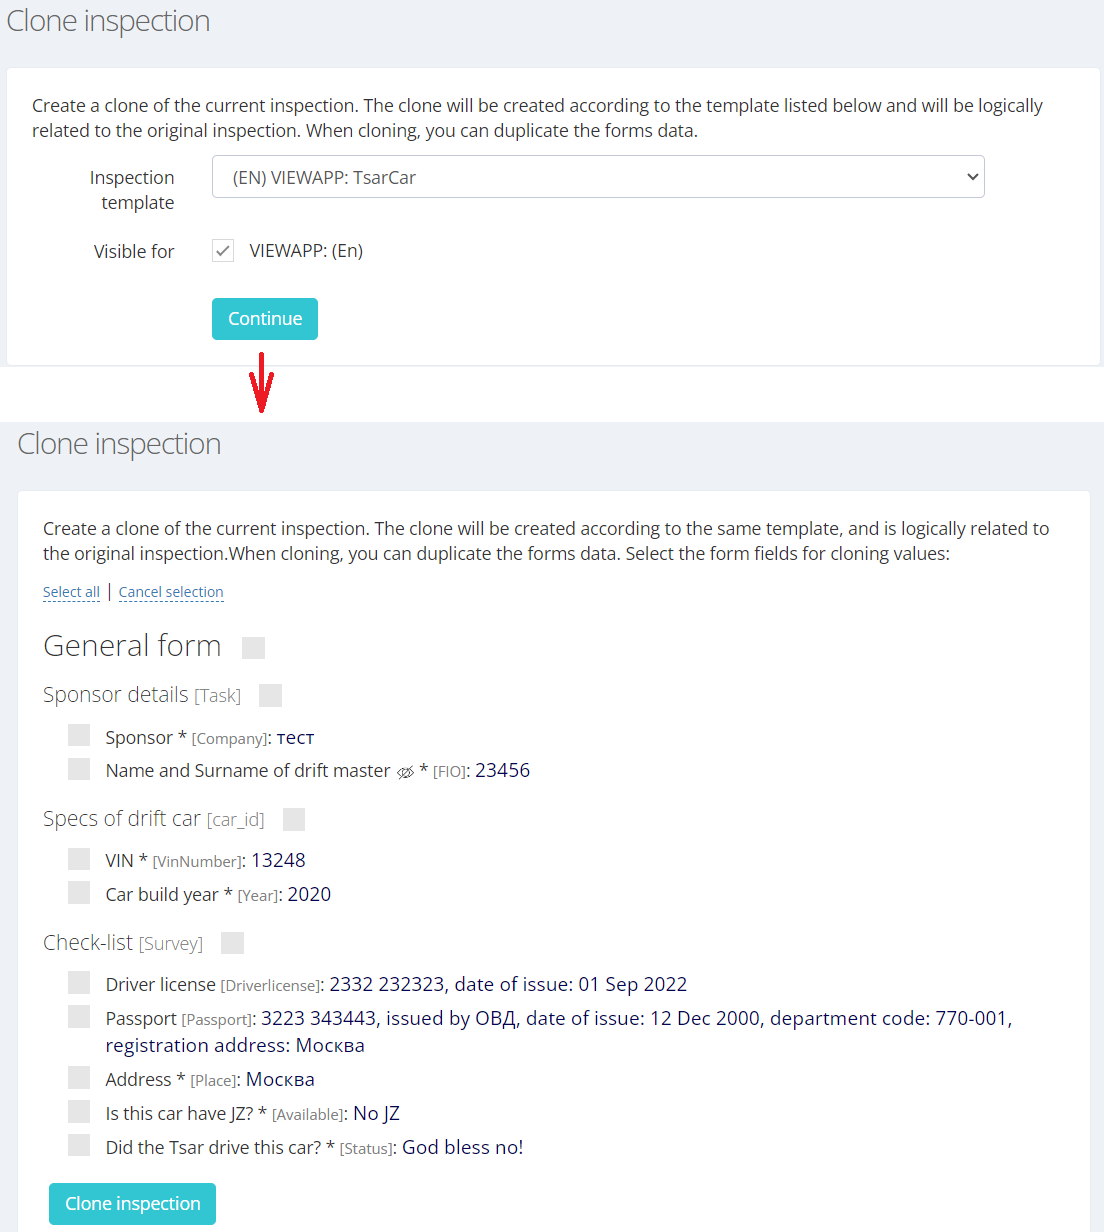
“Clone inspection” - allows you to create a New Inspection using the Inspection template used in the current inspection, it is also possible to copy the selected details to a new inspection.
"Inspection contract" - Press the button to start downloading the generated PDF-document of the inspection regardless of the current status of the inspection
“Make PDF” - by pressing the button, the system generates the specified PDF-form based on the specified fields of the form and the performed inspection steps. PDF-form is selected on the Inspection template settings page;
“Test (remove from bill)” - at the click of a button, the system disables VIEWAPP's obligation to process and store the current inspection (SLA), i.e. no emails will be sent on such an inspection, will not be included in the billing, etc. Reverse action - “Return to bill”
"Lock inspection to me" - When performing an Expertise, the Expert can use this to prevent other users from changing the data during the expertise.
Reverse action - “Unlock inspection”
| Webhooks history (events for the month only) |
Information on all webhooks issued on inspection. Contains information about the event, date, time, recipient of the webhook and the result of the send, with the ability to repeat the webhook manually. 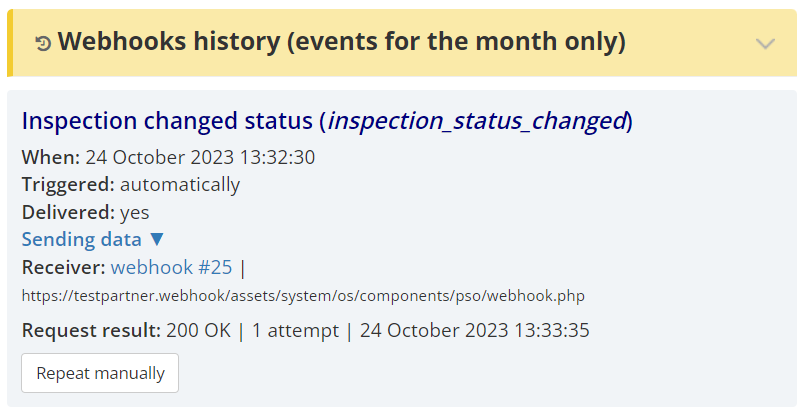
More info about Webhooks at Integration into the VIEWAPP
|
Checking for correct execution
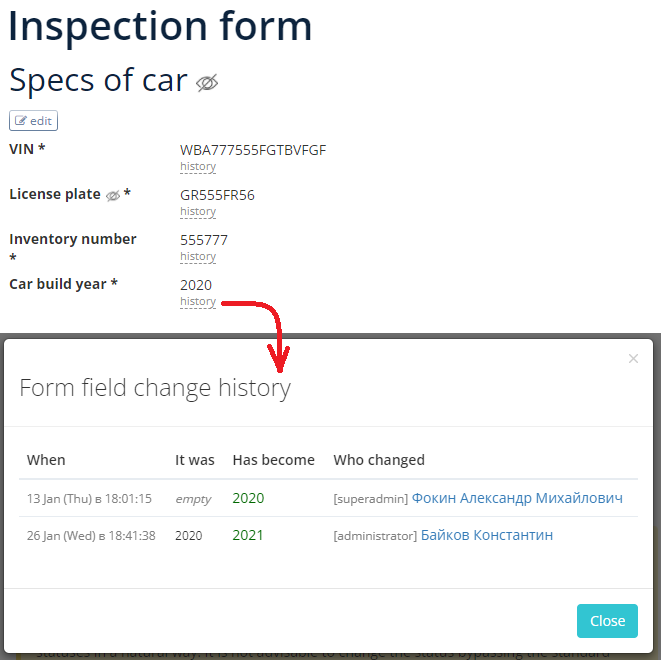
Checking the correctness of the filling Inspection form:
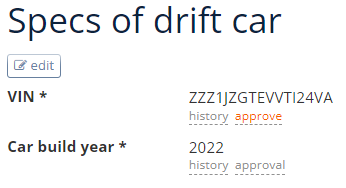
If the field is filled out incorrectly, you can immediately correct it, as well as view the history of changes
Form field approval
If necessary, an incorrectly filled field can be returned to the performer for improvement by pressing the button “Approval”.
To do this, in the form "form field approval" you must specify:
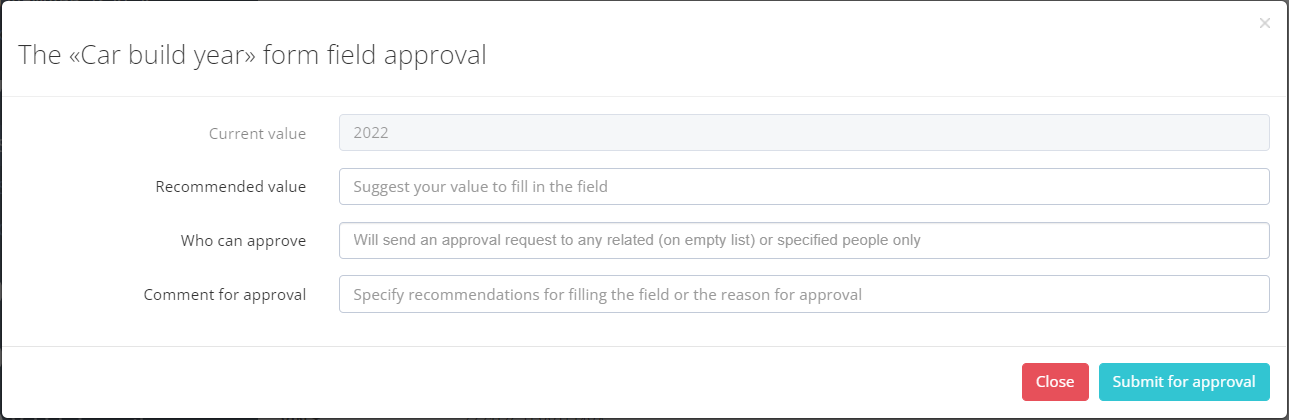
-
Recommended value - recommended value that will be shown to the user in the app
-
Who can approve - sel ect user who can approve this field
-
Comment for approval - random text commend of the field that will be shown in the app
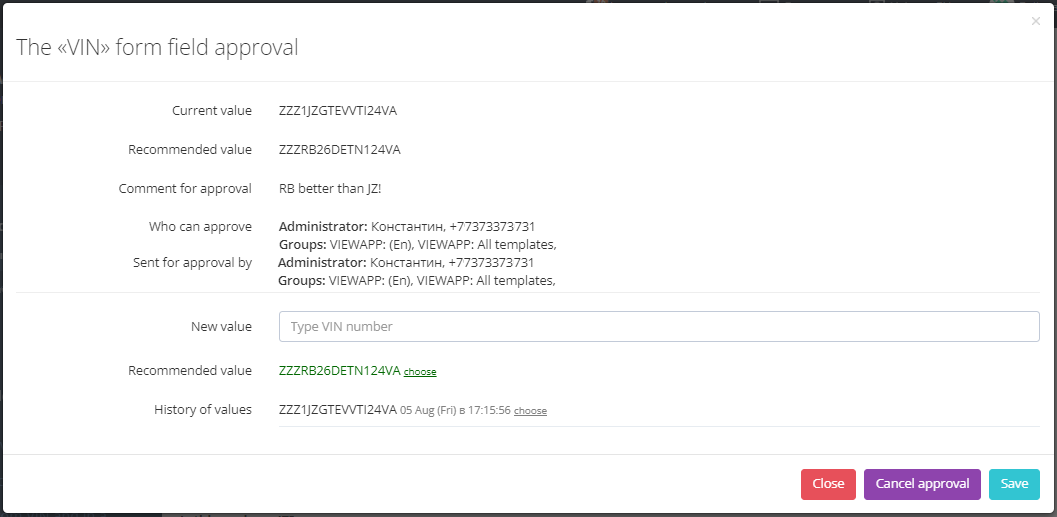
After filling in press “Submit for approval”.
Subsequently, on the agreed field is possible "Cancel approval".
Additional files
It is possible to download additional files, if needed
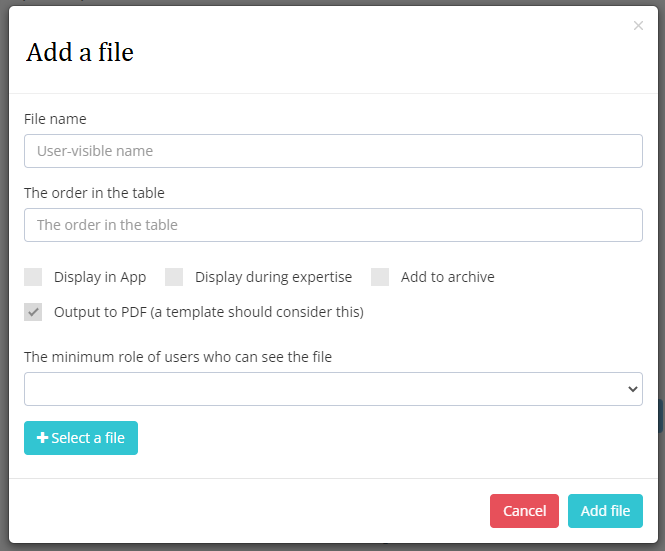
When downloading it is necessary to specify the file parameters:
-
File name - the name under which the file will be displayed in the system
-
The order in the table - sorting in a table (digits)
-
Display in App - show the downloaded file in the mobile app
-
Display during expertise - show the downloaded file for use in the "Comparison" function during the Expertise (for example, you can upload an example of a qualitatively performed step, so that the expert can clearly compare and evaluate the photo made by the user)
-
Add to archive - add the file to the final ZIP archive
-
Output to PDF(a template should consider this) - add output to the final PDF form
-
The minimum role of users who can see the file - role, which allows you to see the file on the system
You can use the downloaded files as a reference point for comparison during the Expertise, using the "Comparison" function in the page header.

Share inspection
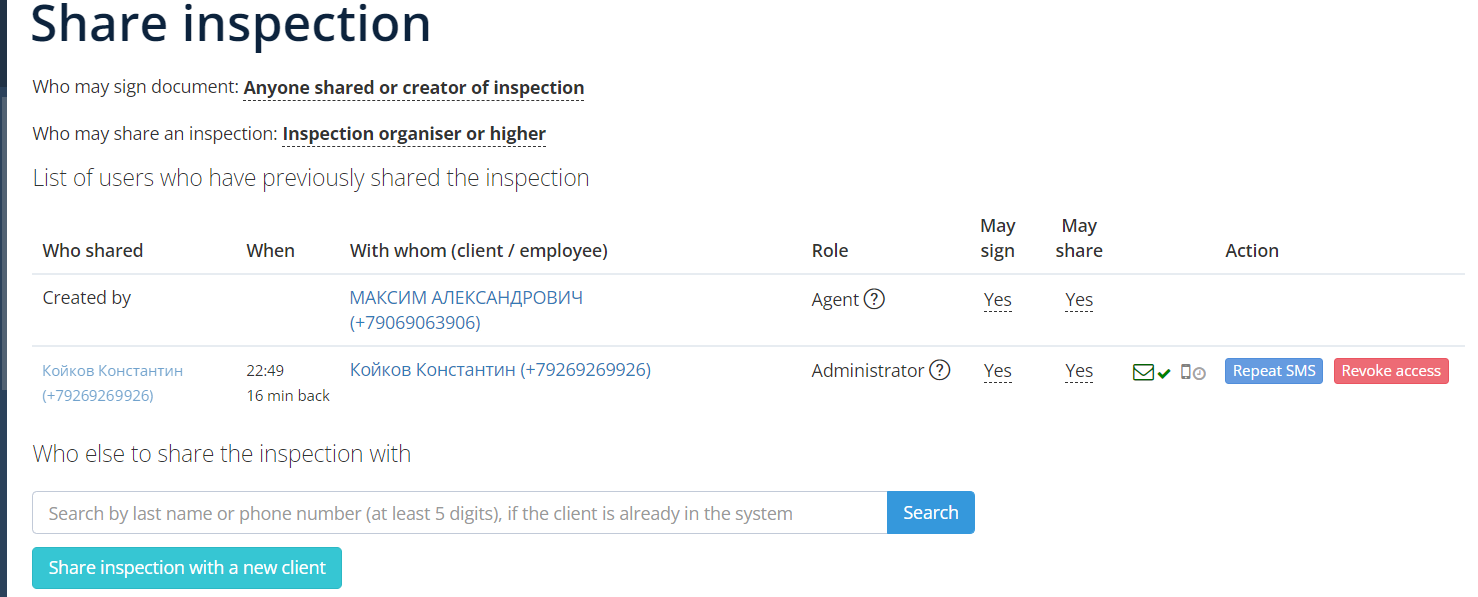
The "Share inspection" block allows you to manage the availability of the inspection and manage the following options:
-
Who may sign document - setting by User Role or by user's relation to the inspection
-
Who may share an inspection - setting by User Role or by user’s relation to the inspection
In the "List of users who have previously shared the inspection" displays information about all users with whom you have additionally shared the inspection.
Also in the list it is possible to individually expand the ability to "May Sign the inspection" or "May Share inspection".
Checking the data obtained
-
photo or video in step;
-
correctness of filling in the editable step form (if available);
-
step’s coordiantes.
The inspection process of a repeatable type
The process may be repeatable and optional.
The App allows you to send an inspection for verification without completing this process.
How many objects / elements will be shooting, the user determines at his discretion.
If necessary, add an empty process forcibly by pressing "Add a preset forcibly" button.
"Import / Export Excel file" button opens the function (on a new page), which allows you to create multiple repeatable process simultaneously based on the downloaded template.
In Repeated processes it is possible to change additional settings of the application:
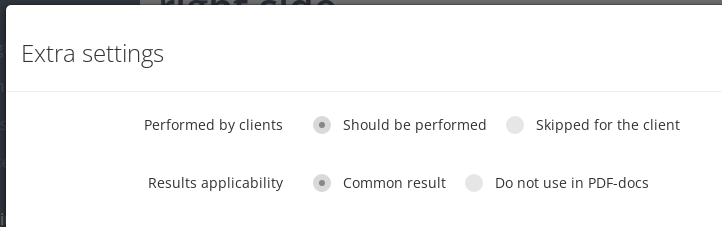
Performed by clients:
-
Should be performed - normal process execution in the mobile app;
-
Skipped for the client - the process is not required to be executed by the client (in the mobile app the process will be marked as executed).
Results applicability:
-
Common result - standard display of the process result in the final PDF form and use in zip archives and other places;
-
Do not use in PDF-docs - not display the result of the process in the final PDF form, but is output in a zip archive and other places.
"Create a new process based on the current one" function allows you to create a new process by copying the current process, including the selected fields of the form to be edited. 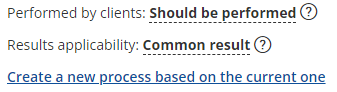
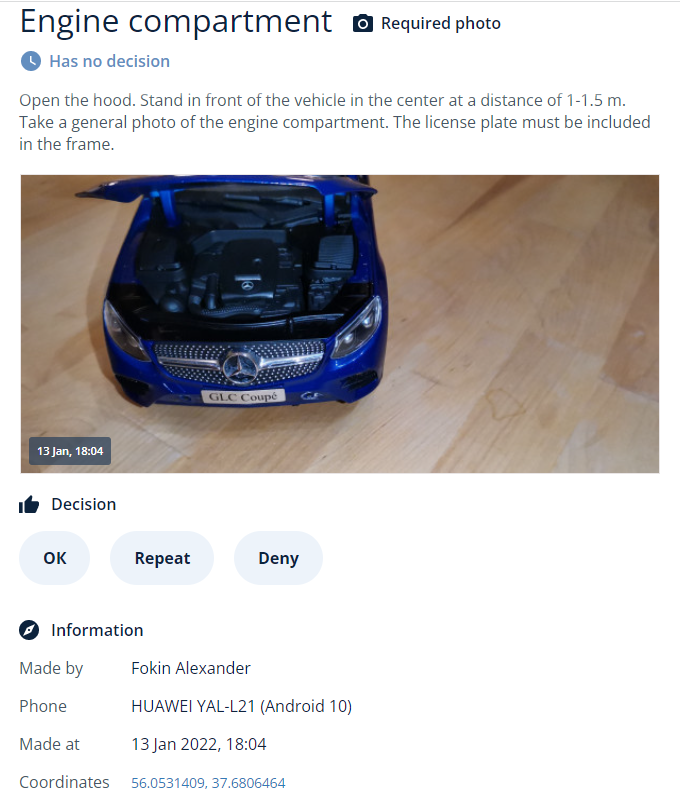
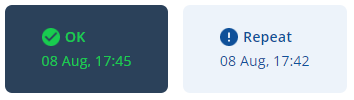
Choose one of the solutions in a step fr om the options:
“OK” - The step is done correctly, it does not require any rework by the user;
“Repeat” - The step is correct, but requires clarification from the user;
“Deny” - The step is not performed correctly, redoing by the user is not possible;
“Approval” - The step is correct, but requires additional approval by the Approve Person.
The final decision will be displayed under each Step as a Step Attempts History, wh ere each button corresponds to one attempt.
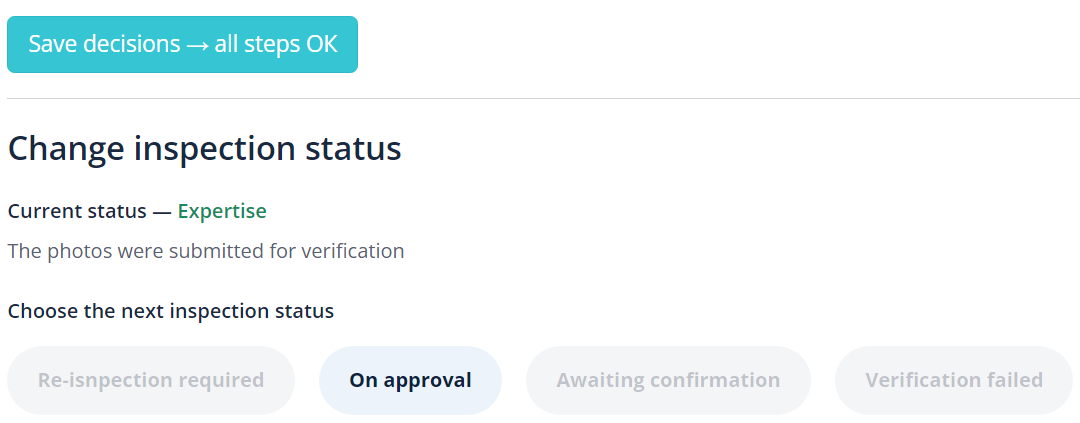
After checking all the Steps - it is necessary to “Save decisions” or “Save decisions - all steps OK” (in case the Inspection template has the setting Allow one-click approval).
Move inspection to the next status
After that, it is necessary to transfer the Inspection to one of the Statuses:
-
Re-inspection required - if one of the steps has a solution “Repeat”;
-
Contract - if all steps have a solution “OK” or the inspection is accepted by the button “Save decisions - all steps OK”;
-
Verification failed - if one of the steps has a solution “Deny”;